 |
How We Built the Grain Bins |
|
|
How We Built the Grain Bins |
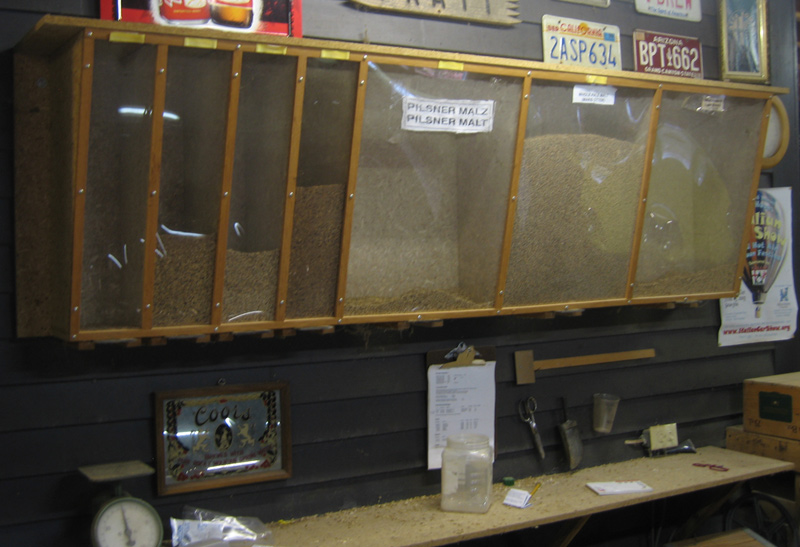
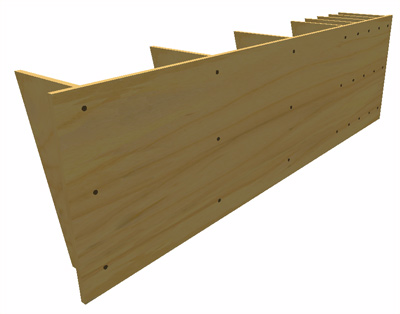
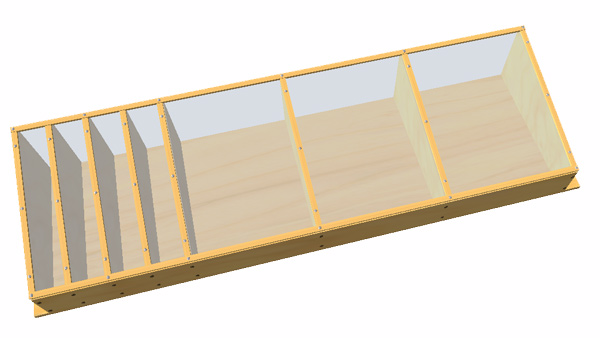
Grain Bins Front View
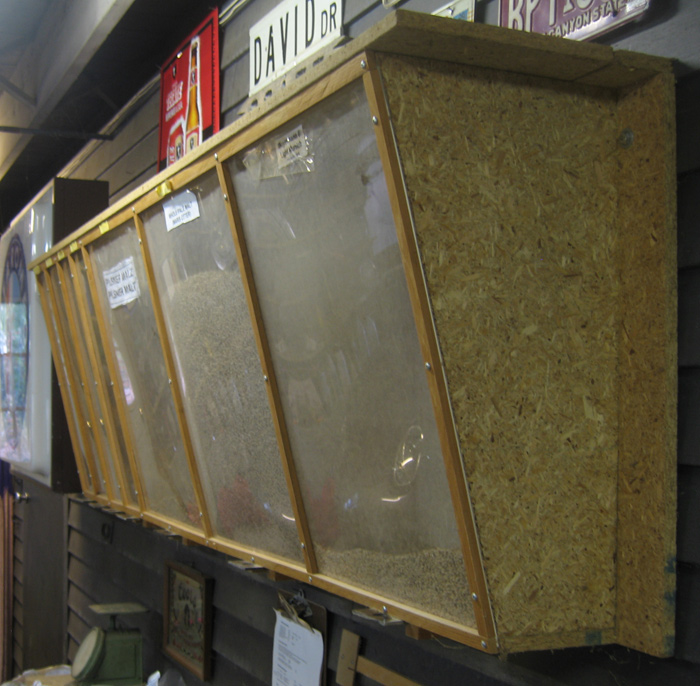
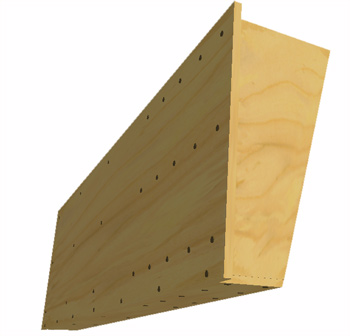
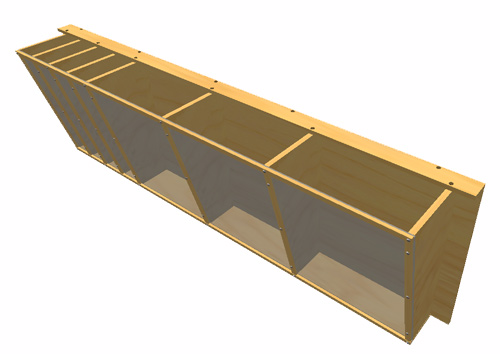
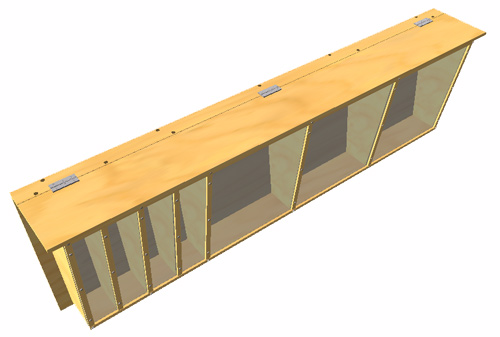
Grain Bins Side View
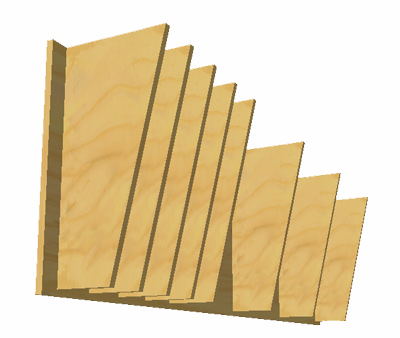
Brother John and I had no plans ahead of time — we just winged it one afternoon. But the results are quite good and several fellow homebrewers have asked for plans so they can make their own. So, after the fact, here they are. Modify to suit your needs or desires. (See my "How I Brew Beer" videos to see the grain bins and other brewing toys in action.)
Bill of Materials
1.5 4' x 8' sheets of 3/4" particle board 1 4' x 8' sheet of 1/8" plexiglass 4 8' lengths of 3/4" x 3/8" rectangular molding 3 Small hinges 1 Box of 100 #8 x 1.5" pan-head sheet metal screws 1 Box of 100 #10 x 2.5" flat-head wood screws 1 8' length 1" x 2" pine 5 5" long 3/8" lag screws 5 Washers for above Wood glue Instructions
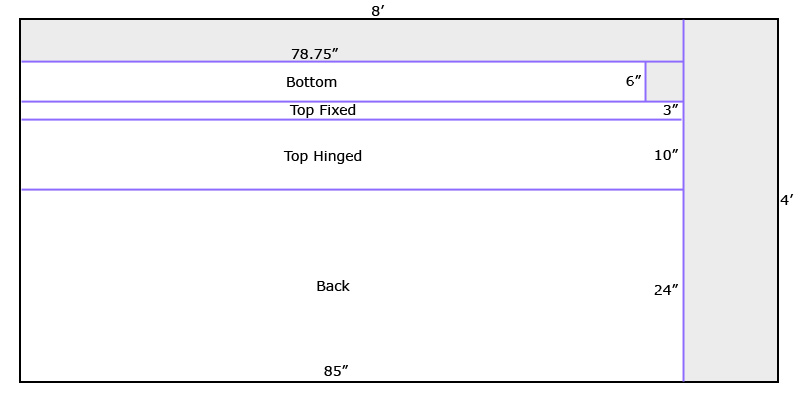
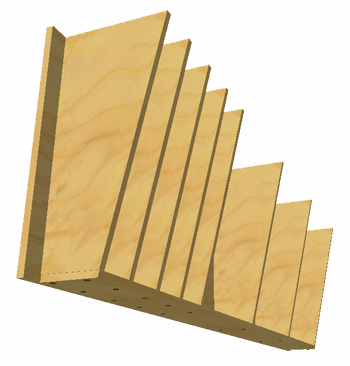
1. Cut the particle board up into the required pieces using the guides below. All are right-angle cuts except for one of the bottom's long edges — tilt the saw blade slightly so that the angle is about the same as that of the dividers — the bottom should measure 6" on one side and about 5-7/8" on the other.
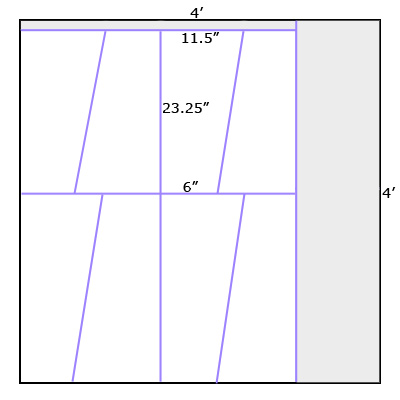
Dividers - 8 identical pieces2. Cut the plexiglass up into the required pieces using the guides below. (You only use half of the sheet — give the other half to a homebrewing friend.)
3. Mark the back where the dividers will go horizontally. We made 3 large and 4 small bins. (The large bins each hold a 50# bag of grain, while the small ones will hold 20# each.) To do this, we marked the back at 3", 9", 15", 21", 27", 45", 63", and 81". Use a square and draw lines to mark where the left edge of each of the dividers will go.
4. Attach the dividers to the back. The longer edge of the dividers is the top, and this should be flush with the top edge of the back, leaving 3/4" at the bottom. Pre-drill three holes for the #10 x 2.5" flat-head wood screws through the back into each divider so the wood doesn't split. Apply wood glue to the joints and attach the dividers with the screws. Use a square to make sure that the dividers are perpendicular to the back:
5. Attach the bottom. The beveled cut goes on the front, to continue the tapered shape of the dividers. Pre-drill two holes for the #10 x 2.5" flat-head wood screws through the bottom into each divider so the wood doesn't split. Also, pre-drill a few holes through the back into the bottom for screws. Apply wood glue to the joints and attach the bottom with the screws. Use a square to check that the dividers are perpendicular:
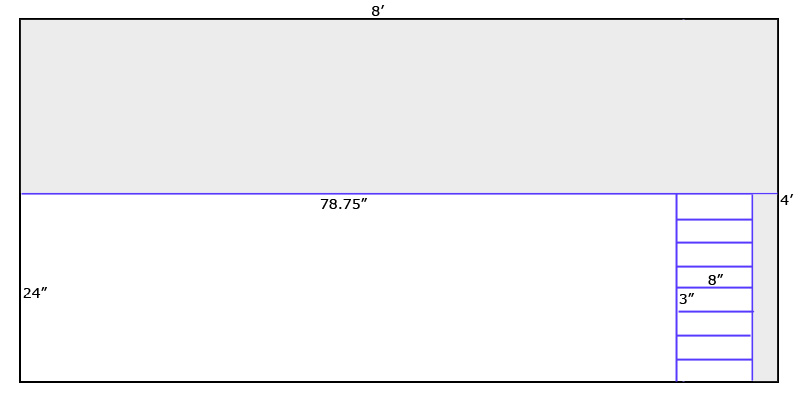
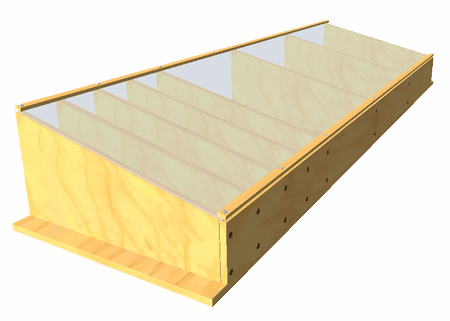
6. Mount the plexiglass. Cut two pieces of molding to a length of 78.75". Put the wooden assembly on its back. Lay the large piece of plexiglass across the dividers. Lay a piece of molding on the plexiglass along the bottom. Pre-drill holes for six #8 x 1.5" pan-head sheet metal screws through the molding and plexi into the bottom. Attach the screws. Lay the other piece of molding on the plexiglass along the top. Pre-drill six holes through the molding and plexi into the dividers. Attach the screws:
7. More molding. Measure the distance between the top and bottom moldings. Cut 8 more pieces of molding to this length. Lay them on the plexi atop each divider. Pre-drill holes for three #8 x 1.5" pan-head sheet metal screws through each molding and plexi into the dividers. Attach the screws:
7. Attach the fixed part of the top. This 3"-wide part is flush with the back. Pre-drill holes for the #10 x 2.5" flat-head wood screws through the fixed top into the back and several dividers. Apply wood glue to the joints and attach the fixed top with the screws:
8. Attach the lid. Lay the hinged part of the top next to the fixed part. Lay the hinges over the joint between the fixed and hinged parts and attach with the hardware provided with the hinges:
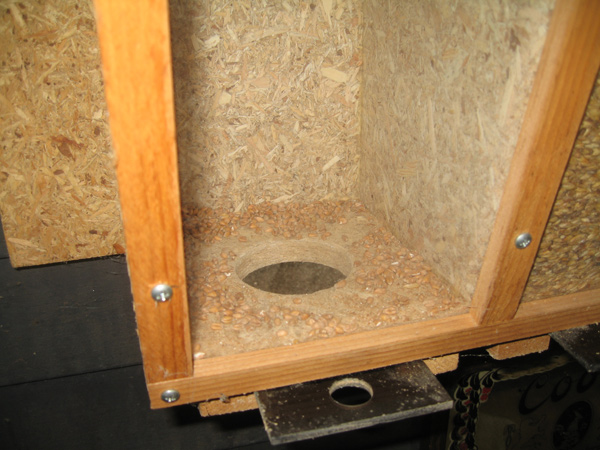
9. Drill the grain openings. Using a 2" hole saw, drill 8 holes in the bottom, centered in each bin:
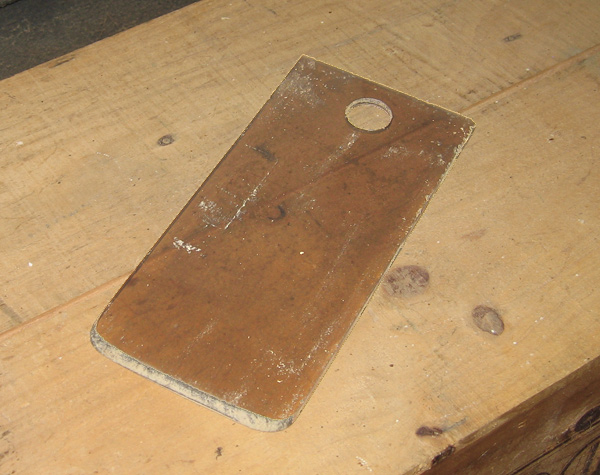
10. Make the sliding doors. Drill a 1" hole in each of the eight 3" x 8" pieces of plexi, 1.25" in from the end. Round the corners on the opposite end, giving them a 1/2" radius. Smooth the edges to allow easy sliding:
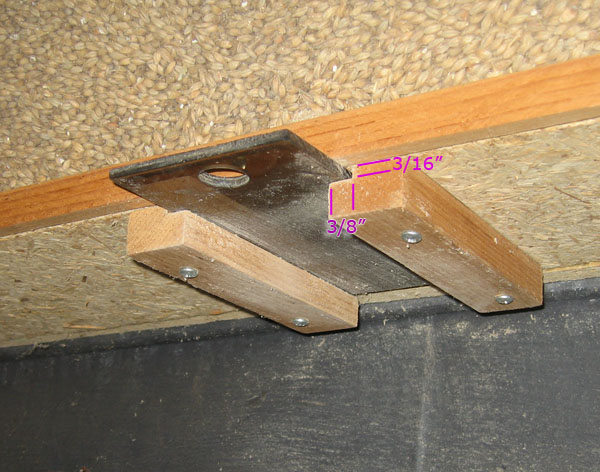
11. Make the sliding door guides. Cut the 8' length of 1" x 2" pine into sixteen 5.5" pieces. Rout the corner of each piece 3/8" in the wider direction and 3/16" in the narrower direction, using a router or table saw. Turn the grain bin assembly on its top. Center a sliding door over a grain opening and lay a door guide alongside it. Pre-drill two holes for the #8 x 1.5" pan-head sheet metal screws through the guide into the bottom. Attach the screws. Lay another guide on the other side of the sliding door. Leaving 1/16" of side-to-side play, pre-drill two more holes and attach the screws. The door should slide freely. Repeat for the other seven door assemblies.
12. Mount to the wall. The grain bin may be holding up to 200# of grain, so it needs to be mounted securely. We chose to use lag screws right into the wall's studs. Locate the studs, and mark the back piece of the bin correspondingly, 3" down from the top. Drill 3/8" holes there. Mark the wall and pre-drill into the studs for the 5" x 3/8" lag screws. Mount the bins to the wall using the lag screws and washers.
Voila! Flip the lid open and fill up the bins with your grain. Then you can dispense grain for your recipes as you need it, and visually keep track of what types are running low. Please contact me at dave@dvpratt.com with any questions, comments, suggestions, whatever. Cheers!